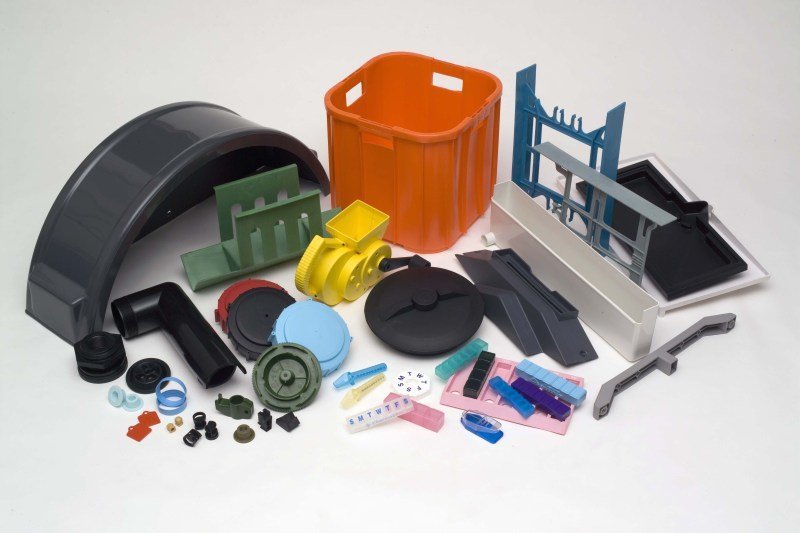
Example of Injection Molded Parts:
1. Initial Tooling - Mold Setup The injection molding process begins by preparing a steel mold, which comprises two main components: the “core” and the “cavity.” These two parts come together to form the shape of the desired object. The design of the mold takes into account various aspects like material shrinkage and cooling patterns to ensure precision.
2. Part Production - Preparing the Material In this step, plastic resin in the form of pellets or granules is loaded into a hopper. These pellets are then heated until they melt. A mechanism known as an auger or reciprocating screw inside the machinery moves the molten plastic towards the mold’s core and cavity.
3. Injection of Plastic The molten plastic is propelled into the mold’s cavity using a nozzle connected to a runner system. The injection unit, consisting of a barrel and a screw, pushes the plastic into the mold under high pressure. This ensures that the mold is completely filled and that the plastic reaches every detail of the intended design.
- Depending on the size of the plastic part, the tonnage (clamping force) for the press can range anywhere from 25 to 4000 tons!
4. Cooling and Solidification After the mold is filled, the plastic cools and solidifies within the mold. The cooling process, often enhanced by cooling channels in the mold, varies based on the type of plastic, the design of the part, and its thickness. Adequate cooling is crucial for maintaining the shape and precise dimensions of the part.
5. Mold Opening Once the plastic has solidified, the mold is opened by separating its two halves, usually via hydraulic or mechanical means. The mold may also feature components like ejector pins or plates to assist in removing the part from the mold.
6. Part Ejection The solidified part is then ejected from the mold cavity with the help of ejector pins or plates. It is then collected on a conveyor belt or in a bin. Any excess material, such as sprues or runners, is also removed at this stage.
7. Post-Processing The ejected part may require further processing to remove any residual sprues, burrs, or flash. This can involve techniques like trimming, sanding, or machining to achieve the desired surface quality and accuracy. Additional finishing processes like painting, printing, or assembly might also be conducted as needed.
The video below provides a great visual explanation -

